
When you’re considering removing a large tree from your property, it’s crucial to approach the task with a clear plan and the proper precautions. Start by assessing the tree’s condition—look for signs of disease or structural damage, and consider its lean and proximity to any hazards like power lines or buildings. You’ll need specific tools, including a chainsaw, safety gear, and tree-felling wedges. Planning the removal involves ensuring clear escape routes and understanding the correct cuts to make. But what exactly are the steps to execute this safely and efficiently? Let’s break it down further.
Assessing the Tree’s Condition
Before you remove a large tree, it’s crucial to assess its condition thoroughly. Start by examining the tree’s health. Look for visible signs of disease, such as discolored leaves, fungal growth, or dead branches. These symptoms can indicate structural weaknesses that might complicate the removal process. You’ll also want to check the trunk for cracks or cavities, which can affect the tree’s stability.
Next, evaluate the tree’s lean. A tree leaning significantly in one direction may pose a higher risk during removal. If the lean is severe, it might be safer to consult a professional. Remember to inspect the root system. Exposed roots or signs of decay can weaken the tree, making it unpredictable and dangerous to cut down.
Also, consider the surroundings. Are there power lines, buildings, or other structures nearby? If so, the removal process will be more complex and risky. Please take note of the tree’s height and how its branches spread. This will help you plan how and where the tree will fall, minimizing damage to property and ensuring your safety.
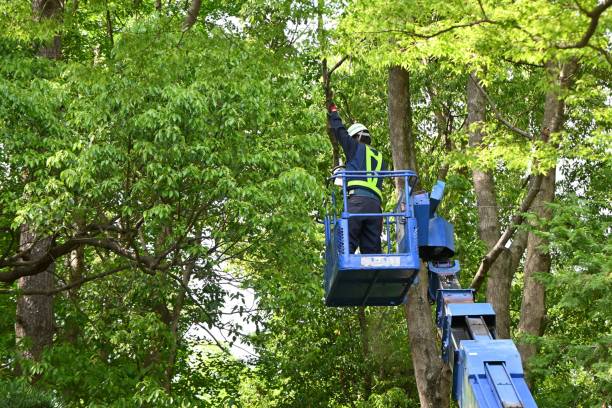
Gathering the Necessary Tools
The right tools are essential for a safe and efficient tree removal process. You’ll need to ensure you have the proper equipment before starting. First, get a chainsaw that’s appropriate for the tree’s size. A small chainsaw won’t cut it for a large tree, so make sure it’s powerful enough. Remember to have extra chains and fuel on hand.
Next, you’ll need a set of tree-felling wedges. These help guide the tree where you want it to fall and prevent the saw from getting pinched. A sledgehammer is also helpful in driving the wedges in.
Safety gear is non-negotiable. Equip yourself with a hard hat, safety goggles, ear protection, and sturdy gloves. A first-aid kit should be easily accessible in case of emergencies.
You’ll also need ropes and a harness, especially if climbing the tree to cut branches. A pole saw can help trim higher branches before the main cut. Lastly, a sturdy ladder will help you reach higher areas safely.
Executing the Tree Removal
With your tools gathered and safety gear in place, it’s time to start executing the tree removal. First, assess the tree’s surroundings for potential hazards like power lines, structures, or other trees. Clear the area of people and pets.
Next, plan your escape routes, ensuring you have at least two clear paths to move away quickly if the tree falls unexpectedly. Begin by making a notch cut on the side of the tree facing the direction you want it to fall. This cut should be about one-third of the tree’s diameter and at a 70-degree angle.
After the notch cut, move to the opposite side to make the felling cut. This cut should be slightly above the bottom of the notch cut, allowing the tree to hinge and fall in the desired direction. Use wedges to prevent the tree from pinching your saw and to guide its fall.
Once the tree starts to fall, step back and use your escape route immediately. Never turn your back on a falling tree. After the tree is down, cut the branches and trunk into manageable pieces, always prioritizing safety.